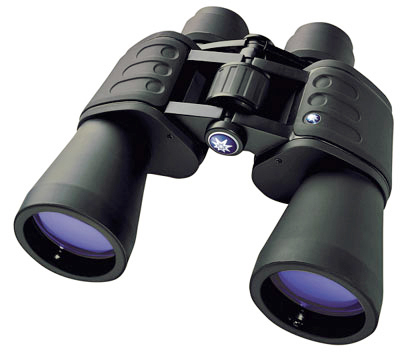
Which Binoculars Should I Buy? – 365 Days of Astronomy Podcast

Listen here.

How to build a mount here.

Buying Your First Binoculars

Hi, I’m Alice Enevoldsen, coming to you today from Alice’s AstroInfo headquartered in cloudy Seattle, Washington. Today we’re talking about purchasing a first pair of binoculars instead of a first telescope.

The two most common questions asked of those of us who host or teach stargazing are: “Hey! I saw this thing last night, what was it?” and “What should I buy for my daughter/ nephew/ friend/ self as his or her first telescope?”

The second question is an exciting one, because it means we’ve succeeded: you want more! Unfortunately, my answer is disappointing. Like most other amateur astronomers, I will tell you to skip the first telescope and start with binoculars. I have a few back pocket “first scope” recommendations, but they’re more expensive than you really want for an introduction. You really should start with binoculars, because they’ll allow you to learn the sky quickly and cheaply, and know what you want more of.

So here I’m going to help you choose a pair of binoculars, because that’s the part of the conversation we usually end up skipping.

First question: do you currently own a pair of binoculars? If the answer is yes, then those are probably the ones you should start with.

The reason you’re starting with binoculars is because they’re wide-field and easier to move, so you can slowly begin learn the magnified sky. After several hours or a few nights with binoculars and patience you’ll know what things you want to see in more detail, and where they are. This knowledge will help you choose the best telescope for you.

If you answered no to the first question, then you’re looking at buying your first pair of binoculars. Get a general, affordable pair from a brand name you’ve heard before – because that brand name paying attention to the quality of their glass optics. If you want to get into numbers, I recommend a 7×50 or 10×50 pair. This is a little lower magnification than what are usually called “astronomical” binoculars, but you need to start at lower magnification in order to get the wide-field that makes it quicker to learn the basics of the night sky.

The second question is: do your binoculars have a tripod mount socket or adapter? If so, you’re in luck, but none of my binoculars do. Often the tripod mount socket is hidden at the end of the joint between the binocular tubes. Even if your binocs don’t have a socket, get yourself a tripod – any camera store will have one, choose one you like and feel like you can manipulate. One that has a quick-release plate is slightly easier to use.

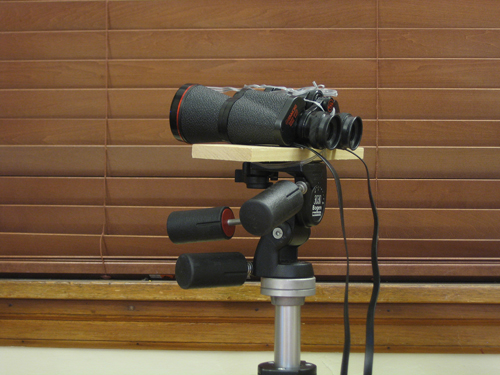
On my website I have directions for how to build a tripod-adapter for any pair of binoculars, but the gist of it is that you’ll screw a thin board about as long as your binoculars are wide to the tripod or quick-release plate, and then use zip-ties, long twist-ties, string, or duct-tape to secure the binoculars to the board solidly but temporarily. There is just one trick: adjust the binocs for your eyes before attaching them to the board, and be sure not to tighten the zip ties so much that you mess up your adjustment.

Having the binoculars mounted to a tripod will let you see much smaller and dimmer objects, better than the cheapest telescopes out there, and almost as well as other beginner scopes … again usually better. This will also let you share your enthusiasm with your younger friends as well. Elementary schoolers and younger are unlikely to have the arm strength and steadiness needed to do astronomical observing with an unmounted pair of binoculars. Even preschoolers and toddlers can get in the fun when the binocs are mounted on a tripod.

So, if you don’t already have a pair of binoculars, go out and grab yourself some 7x50s or 10x50s and enjoy exploring the sky. This time of year look for Jupiter (its moons which are easily visible through binocs), Saturn (it’s moon Titan is also easy to find), and … let me just choose a random binocular favorite of mine…. h and χ Persei, also known as the Double Cluster over between Perseus and Casseiopeia. It should be visible most times of year in a lot of the Northern Hemisphere. I’m choosing this one because it is the first thing I was really able to find after the Moon and the planets, so there’s a special place in my heart for h and χ.

Once again, I’m Alice Enevoldsen of Alice’s AstroInfo. You can find me online at alicesastroinfo.com, no punctuation, on Facebook at facebook.com/FollowAlicesAstroInfo and on Twitter as Alice’s AstroInfo.

Have a wonderful summer and keep your eyes high!

Bye-Bye!

~ A l i c e !

BREAKING NEWS: Possible Nova in Delphinus

There is a new object, probably a nova, visible right now in the tiny constellation of Delphinus, between the bright stars Altair and Deneb in the Summer Triangle. This so-called “transient” object (because it wasn’t there before and will dim away and be gone at some point) is technically easy to see from Seattle. You’ll need binoculars, the clouds to go away, and some patience with yourself and the finder charts. The main barrier to seeing this object yourself is going to be knowing exactly which star is the nova, and learning to read increasingly-zoomed-in star-finder charts.

The Basics

Current object name: PNV J20233073+2046041

Discoverer: Koichi Itagaki of Yamagata, Japan

Equipment: an approximately 7-inch reflector (and a CCD). This is not quite twice as large as Pacific Science Center’s Orion Starblaster, and yet less than half the size of our Columbia Telescope.

Visibility: This object is currently a little dimmer than magnitude 6 – which is the limit of unaided human vision with perfect, dark skies. This object should be easy to pick out with binoculars, and there is a little evidence that it is getting brighter. See Sky and Telescope and Universe Today for finder charts. The constellation Sagitta is pointing straight at the new object.

Discovery Date and Time: Wednesday 8/14/2013 around 12pm Universal Time (a bit past 5am in Seattle)

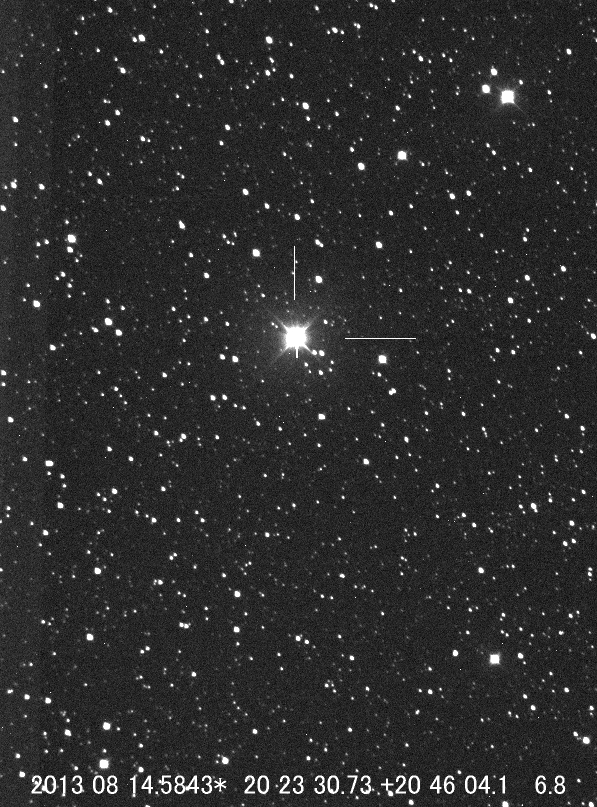
Here is Mr. Itagaki’s discovery photo:

K. Itagaki's image of the Possible Nova in Delphinus

K. Itagaki’s image of the Possible Nova in Delphinus

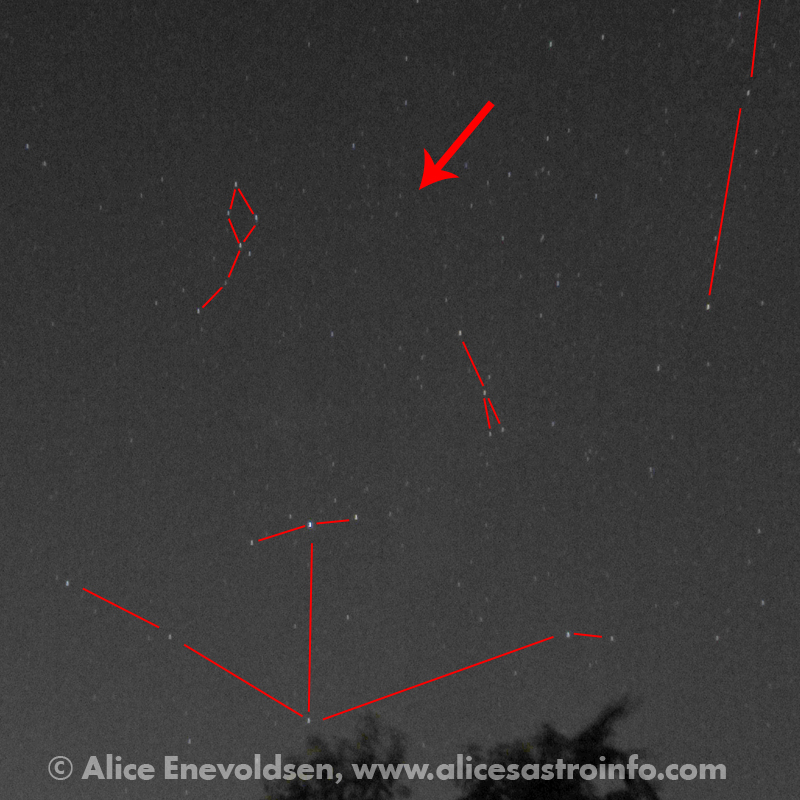
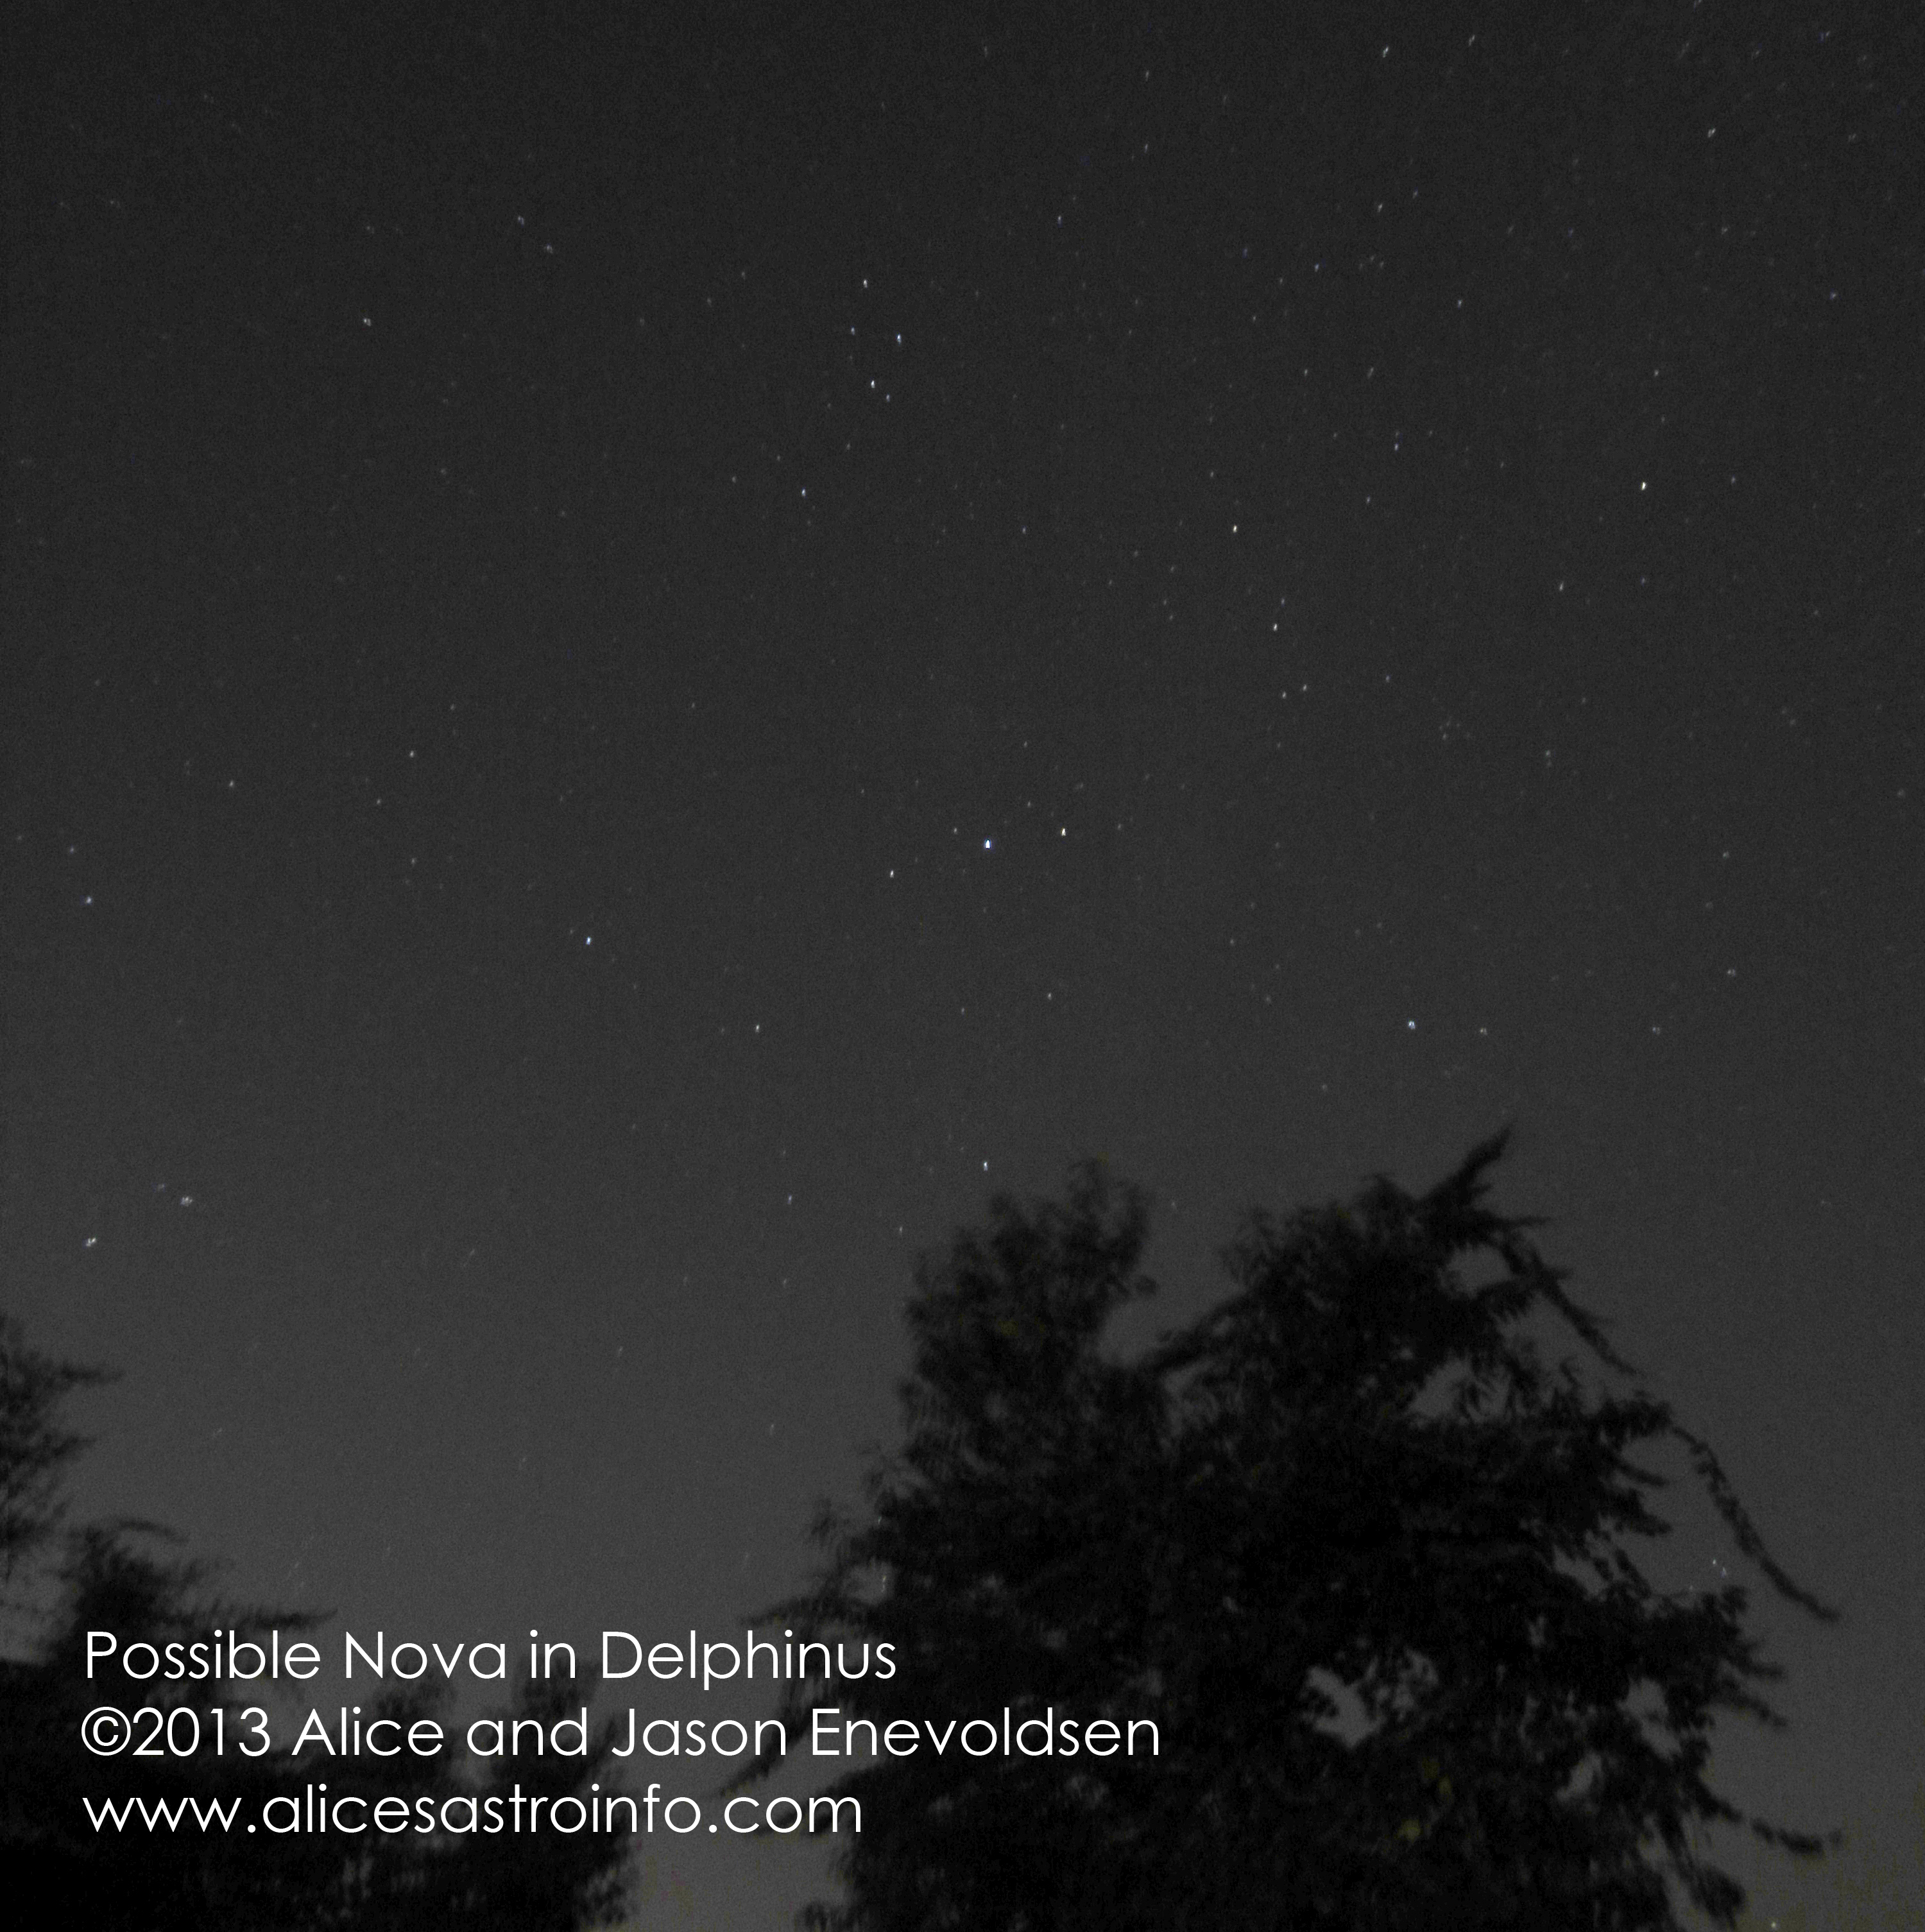
Here is my mostly unprocessed and much larger photo pointing in the right direction. These two photos are at VERY different scales, and the nova is not necessarily visible in my image. It might be, but I need to do more processing. The only thing I did here was brighten it up and add the lines and arrow.

Possible Nova in Delphinus ©2013 Alice Enevoldsen

Possible Nova in Delphinus ©2013 Alice Enevoldsen

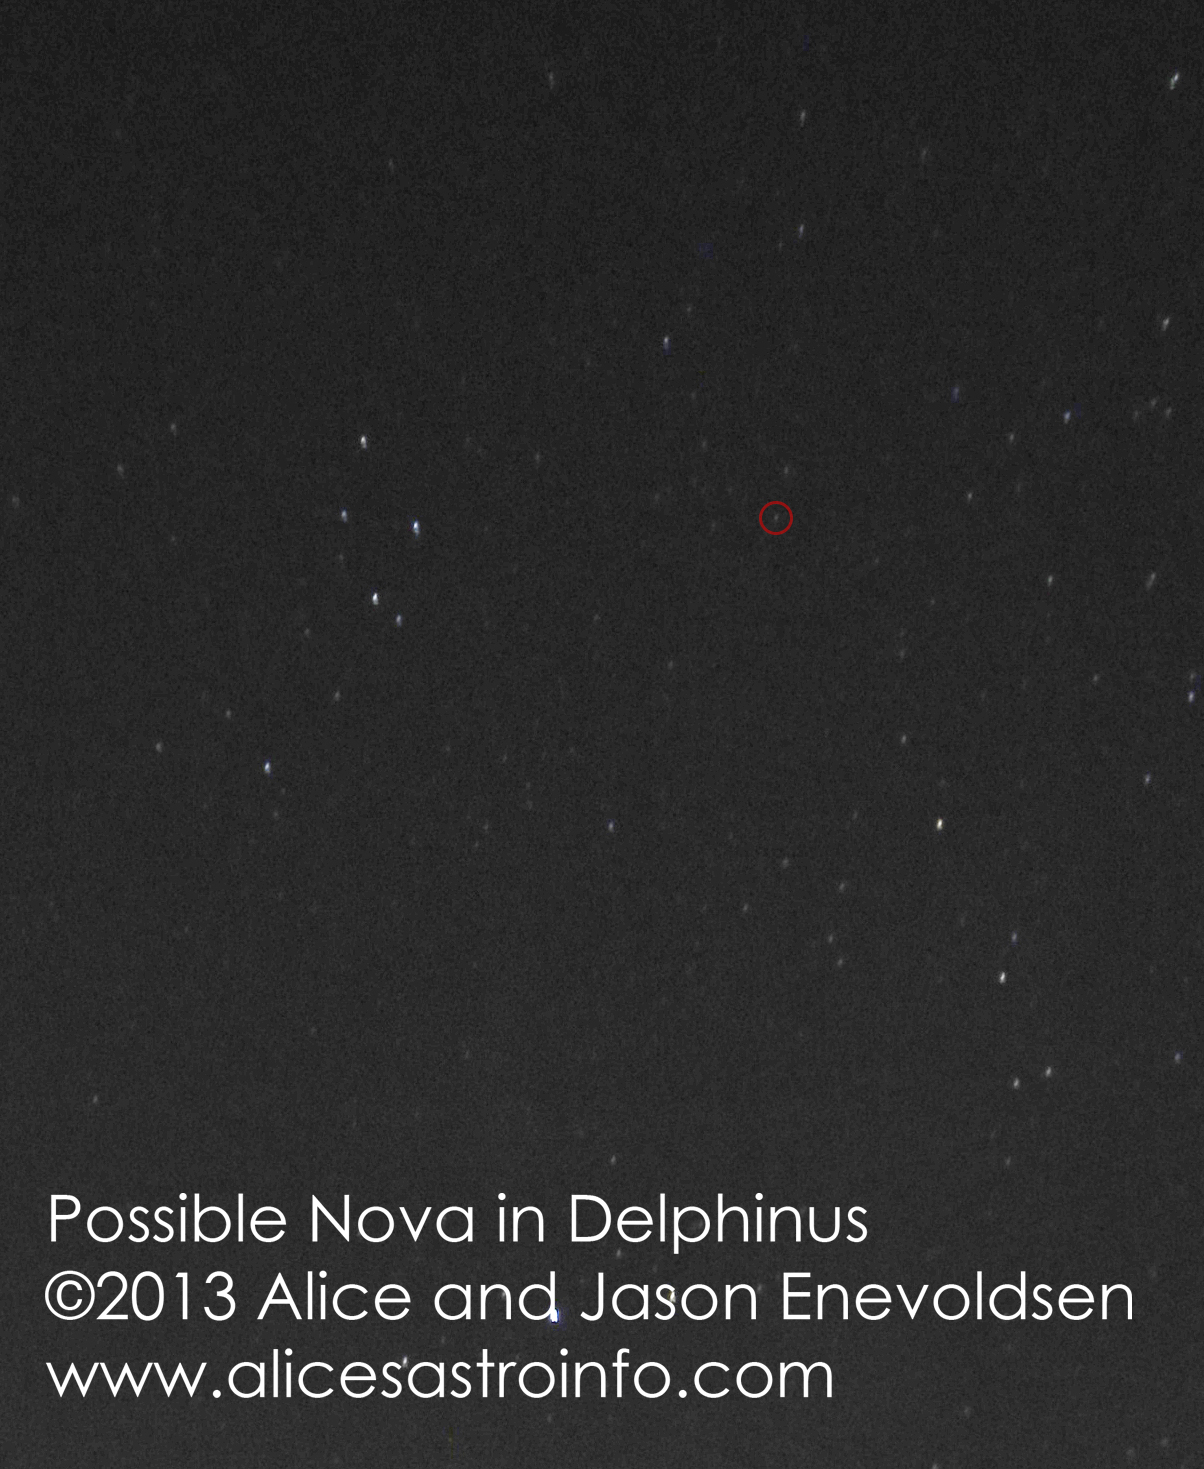
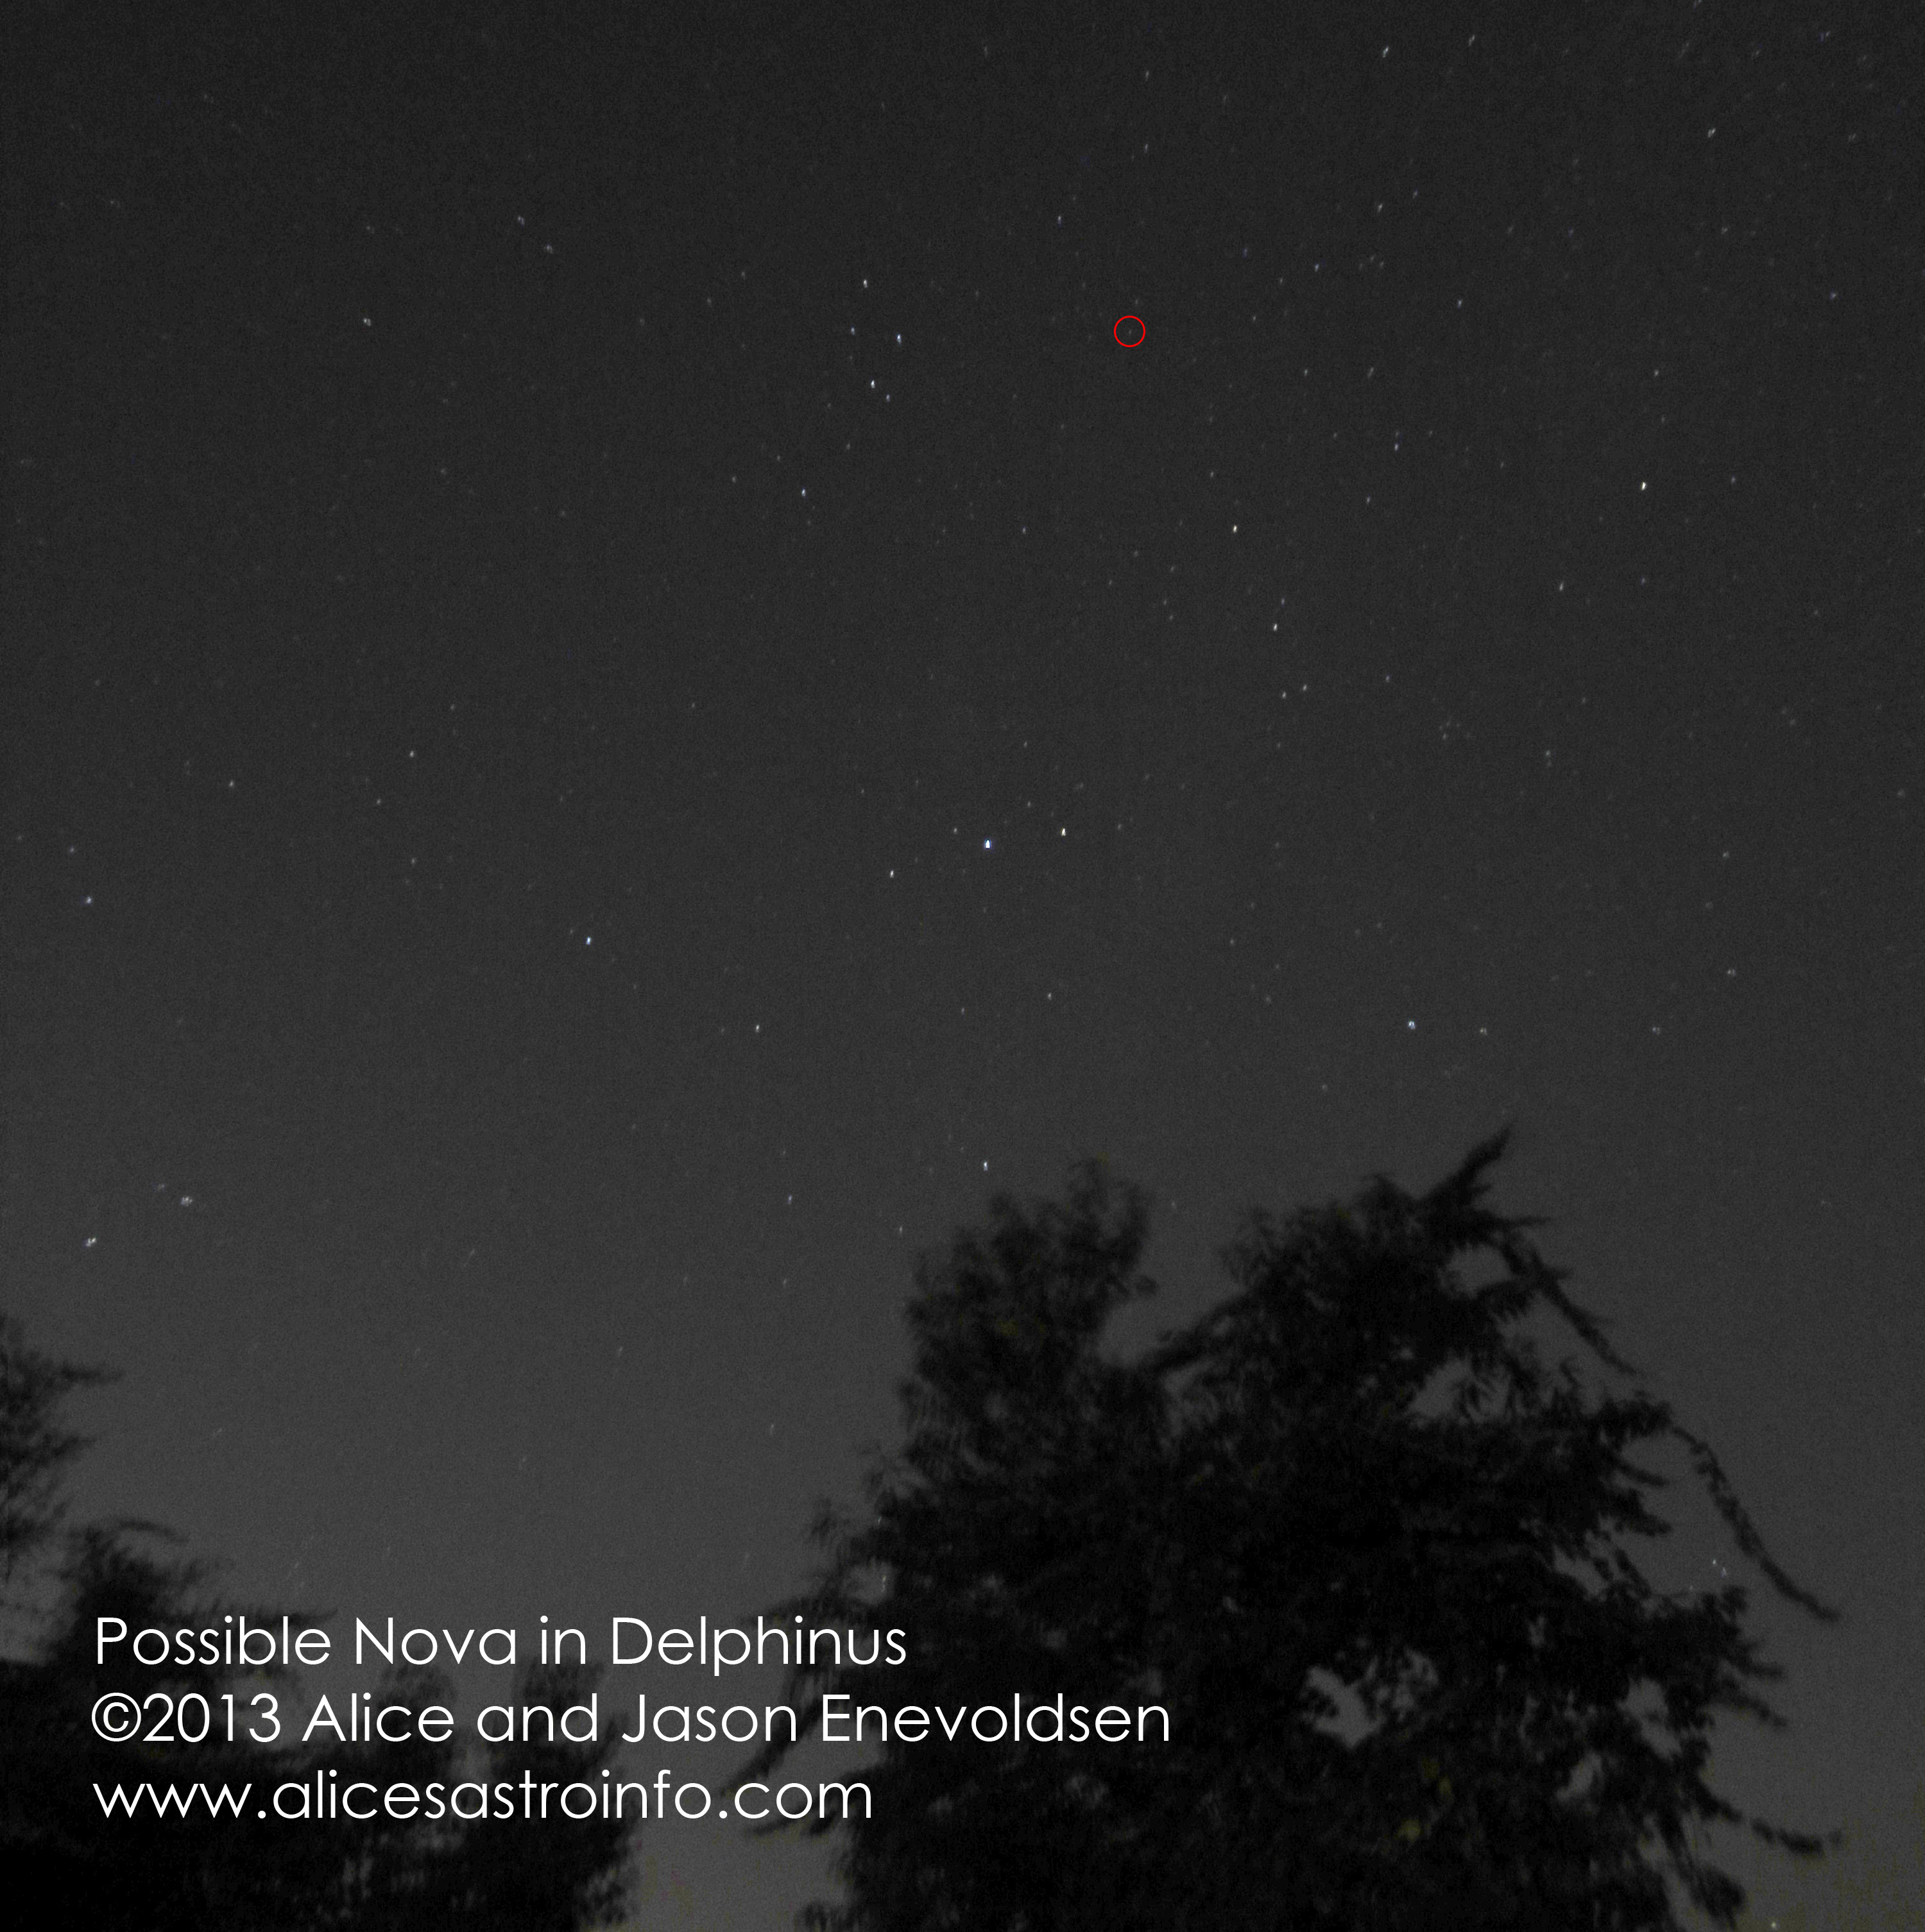
And I DID catch the possible nova! Jason did the processing on these photos. These photos are copyright by me, but you may use them, with attribution, for educational use. Please let me know if you are using these images. Click the image to see the full-resolution version.

Delphinus Nova Closer

nova-cc-crop-marked marked

nova-cc-crop marked

Interpretation hints:

Remember that there are multiple kinds of novae, one of the most common being a two-star system of a giant star and a white dwarf. As material falls from the giant star onto the dwarf star it makes novas every once in a while. This transient object is not confirmed to be a nova at all, let alone a supernova, and we don’t know how far away it is (though it is definitely far enough to pose no threat). Therefore, I recommend against comparing this nova to star-death supernovae (so no Hoberman sphere), though if it comes up you might as well just clarify that there are different types.

This also might be a wonderful time to talk about light-years and distance and time. This supernova definitely happened hundreds, thousands, or millions of years ago. The light just began to reach us yesterday. It isn’t that the nova happened yesterday, it’s that the light just got to us.

Want More?

http://www.aavso.org/bright-68u-possible-nova-del

http://www.cbat.eps.harvard.edu/unconf/followups/J20233073+2046041.html

http://www.skyandtelescope.com/observing/home/Bright-Nova-in-Delphinus-219631281.html

http://www.universetoday.com/104103/bright-new-nova-in-delphinus-you-can-see-it-tonight-with-binoculars/

~ A l i c e !

Summer Solstice Sunset – 2010

  • When: Monday, June 21, 2010 at 9:11pm (so come at 8:30pm)
  • Where: Solstice Park (or, if you’re not in Seattle, wherever you have a view of the western horizon!)
  • Who: Everyone welcome, as usual.

Sunset on June 11, 2009 Credit: Jason Gift Enevoldsen

Come watch the summer solstice sunset at Solstice Park in West Seattle on Monday. We’ll see if the sunset lines up with the placed marker. I’ll be there even if it is cloudy because sometimes the Sun peeks through just as it begins to set, but if it is driving rain I’m staying home with a cup of tea.

If it is clear we’ll bring a telescope or two to take a look at the Moon after the Sun goes down – and Mars and Saturn if we stay until it is dark enough. We will not be able to see the comet – that rises a little before 3am, and I plan to get some sleep before Tuesday. You’re welcome to look for the comet on your own though!

If you’re interested – here’s the timing of various celestial events on Saturday from Seattle, courtesy of the U.S. Naval Observatory Astronomical Applications Department:

Sun and Moon Data for One Day

The following information is provided for Seattle, King County, Washington (longitude W122.3, latitude N47.6):

Monday   21 June 2010          Pacific Daylight Time

SUN
Begin civil twilight       4:31 a.m.
Sunrise                    5:11 a.m.
Sun transit                1:11 p.m.
Sunset                     9:11 p.m.
End civil twilight         9:52 p.m.

MOON
Moonrise                   3:29 p.m. on preceding day
Moonset                    1:36 a.m.
Moonrise                   4:45 p.m.
Moon transit               9:29 p.m.
Moonset                    2:05 a.m. on following day

This event is my part of the NASA’s Solar System Ambassadors program, and thanks to West Seattle Blog for publicizing the last few!

Everyone is welcome, see you there!

~ A l i c e !

Binocular Mount

When you ask most amateur astronomers (or me) which telescope we recommend for beginners, we will all tell you what you don’t want to hear: don’t buy a telescope first. Buy a pair of binoculars, learn the sky, and then buy a telescope. But that isn’t the answer you wanted, so you go buy a telescope anyway. I understand. I’ve been you. So, if you aren’t going to listen to me: here is my advice on what telescope to buy as a first telescope.

If you are going to listen to me (Hooray!), you may have noticed the gaping flaw in my plan: binoculars are very hard to hold steady, almost impossible in fact. At the end of this article** I’ll tell you the story of the 5-year-old Alice and the shaky binoculars. They do make tripod adapters for binoculars, but they require your binoculars to have certain built-in features. I’d rather you just grabbed the closest pair of binocs and started stargazing. The only truly versatile mount I saw costs at least $50.

I don’t have $50 to spend on something that is supposed to be a quick and cheap introduction to assisted stargazing. I also couldn’t find a guide for building such and item, so my husband and I created one.

Instructions for Building a Binocular-to-Tripod Adapter

I have tried to give the simplest instructions here, aimed at using whatever you have on hand and coming out with a clean finished adapter. You can make this as complicated and fancy as you want, or you can hack it together in fifteen minutes with plywood and glue. Use the skills you have.

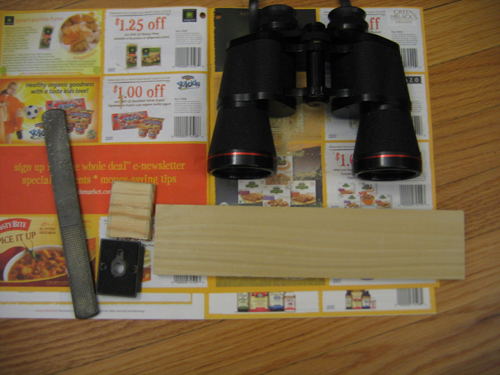
Materials

  • Binoculars
  • Tripod with quick-release plate *
  • Small piece of scrap wood (larger than the quick-release plate)
  • Medium piece of scrap wood (longer than your binoculars are wide, and narrower than they are deep)
  • Two screws (long enough to go through both pieces of wood, thin enough not to split the wood)
  • Two fasteners (zip-ties, heavy-duty twist-ties, velcro straps, bendable coat hangers – whatever you have around)

Tools

  • Saw (for small cuts on wood and cutting through the screws)
  • Wood file (you could also use this to finish your screws instead of the saw)
  • Drill
  • Pencil (or other way to mark the wood)

Directions

Step 1 – Create a new quick-release plate.

Remove the quick-release plate from your tripod. Cut a piece of the small scrap wood that matches its dimensions as exactly as possible. It is okay if the wood piece is thicker than the quick-release plate, but it cannot be thinner, and the edges must be exactly the same to get a solid lock.

Cut a small piece of scrap wood.

Cut a small piece of scrap wood.

Cut it to the same dimensions as the quick-release plate.

Cut it to the same dimensions as the quick-release plate.

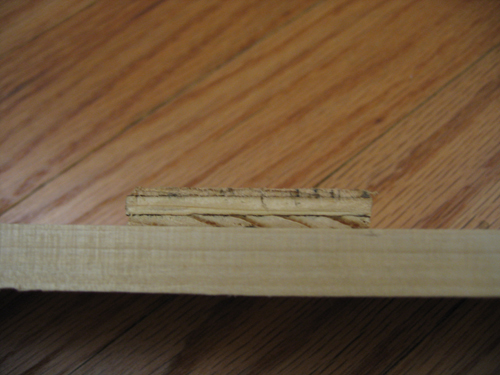
File the angled sides to match the angle of the sides of the quick-release plate. This is where the tripod is going to lock down the plate, so you’ll want to test your angles by inserting the new wooden plate into the tripod head. When it fits neatly and locks firmly into place you’ve done a good enough job.

This is where I had the most trouble. I found that by resting the file flat and holding the wood at the correct angle I was able to file off enough to make my new plate fit.

Hold the wood at the correct angle and drag across the file

Hold the wood at the correct angle and drag across the file

File the edges to match the angle of the edges of the quick-release plate

File the edges to match the angle of the edges of the quick-release plate

Step 2 – Attach to the support for the binoculars

As you can see, I’ve carefully chosen a block of wood that is not as deep as the binoculars so there is room for my nose, and it is wider than the binoculars so I don’t have to be too finicky about exactly where I attach the binocs when I get to that step.

All the finished pieces - ready to combine

All the finished pieces - ready to combine

Now attach the new plate to the wood you’ve chosen as a support for your binoculars. It should be centered both ways.

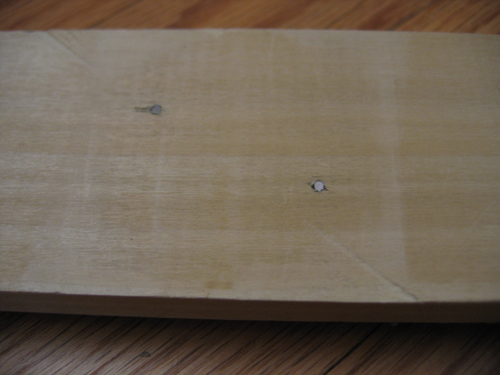
Drill two pilot holes for your screws – you don’t want to split your wood after all that work you put into the new plate. If you put them towards opposite corners you’ll get a nice solid connection, with no chance of slippage or spinning. We also countersank our screws, which you might want to do because it keeps the bottom of your quick-release plate flush with itself.

Position your screws in opposite corners.

Position your screws in opposite corners.

Dont forget to keep the wide side of the plate AWAY from the wooden support!

Dont forget to keep the wide side of the plate AWAY from the wooden support!

File off the ends  of your screws so they don’t poke up and scratch your binoculars.

Filed-off screws

Filed-off screws

Ta-da! You’re done!

Finished Mount (we are using heavy-duty twist-ties instead of zip ties or velcro)

Finished Mount (we are using heavy-duty twist-ties instead of zip ties or velcro)

Oh wait – you want to know how to USE it now?

Step 3 – Using your finished mount

Pull out your binoculars and point them at something far away. Focus them and get them all nicely-adjusted for your eyes. It is important that you do this first, or you may end up fastening your binoculars in a position that is out-of-alignment for your eyes.

Adjust your binoculars

Adjust your binoculars

Attach the mount to your tripod, and rest the binoculars on the mount. Loop your fasteners around the middle of the binoculars and underneath the mount. Fasten them securely, but not so tightly as to change the careful adjustments you made to focus and align the binoculars.

Loop the fasteners around the middle of the binocs, and under the bottom of the support

Loop the fasteners around the middle of the binocs, and under the bottom of the support

Check – do you feel comfortable tilting the tripod head from side-to-side and up and down with the binocs attached the way they are? If not, you need to fasten them more securely. If so, then take it outside and start looking up!

A finished mount, with binoculars attached!

A finished mount, with binoculars attached!

Notes[]()

[*No quick-release plate?]()

If you have a tripod that does not have a removable quick-release plate, you’ll need to attach a 1/4 by 20 nut in the middle of the support wood instead of creating a wooden quick-release plate. (To get the right size nut, just take your tripod either to your stash of random fasteners or to the hardware store and find one that fits it – though 1/4 by 20 is almost entirely standard). I had a thought about this involving a hexagonal hole exactly the size of the nut and some amazing glue. This to That recommends LePage’s Metal Epoxy. I didn’t go through with this idea, so the execution is left as an exercise to the reader. please let me know if you come up with an easy and functional solution!
[]()

[**Alice and the Shaky Binoculars]()

The year was 1986. The month was cold. One night, Mom and Dad bundled 5-year-old Alice and her baby brother, Nils, into the car. Maybe Uncle Ron came too, or maybe he was in a different car. In any case it was clearly a big occasion. Together they drove and drove and drove. The night got darker and darker. Finally, they all pulled over on the side of a steep hill. Alice got out of the car while Mom and Dad got Nils.

Dad got out some binoculars. Mom reminded Alice that we were looking for Halley’s comet. The only thing that really mattered about Halley was that of everyone on the hillside that night, only Alice and Nils would get to see the comet twice.

While Mom turned Nils to face the sky, Dad crouched down to help Alice look through the binoculars. A shiny white object streaked and wobbled through the field of view.

“I see it! I see it!” said Alice, excited.

Once everyone was thoroughly cold, they all got back in the car and drove home – possibly stopping at Shari’s or Denny’s for something warm to drink.

That memory is still with me, which is the most important part of the whole experience. Now I know that wasn’t Halley’s comet I saw in those binoculars, it was a star, or maybe even a streetlight – wobbling past because I couldn’t hold the binoculars still enough. If only we’d had this binocular tripod mount!

At least I know that some of the photons bouncing off Halley’s comet did bounce into my eye, just not enough of them for my brain to register. Oh well, next time. Here I come 2061!

Have fun with your new binocular tripod mount!

~ A l i c e !
What Telescope Should I Buy?

I get asked this question regularly. I wish I could just say “learn enough about telescopes and the night sky so you can answer that question yourself,” but that advice is ignored because it is unsatisfactory. If you press me for an answer, this is what you’ll get.

Half of this is from guest blogger Keith Enevoldsen (my dad!) who didn’t know he was writing for this blog when he wrote these words, but it is sound advice and well worded.

Your First Telescope:

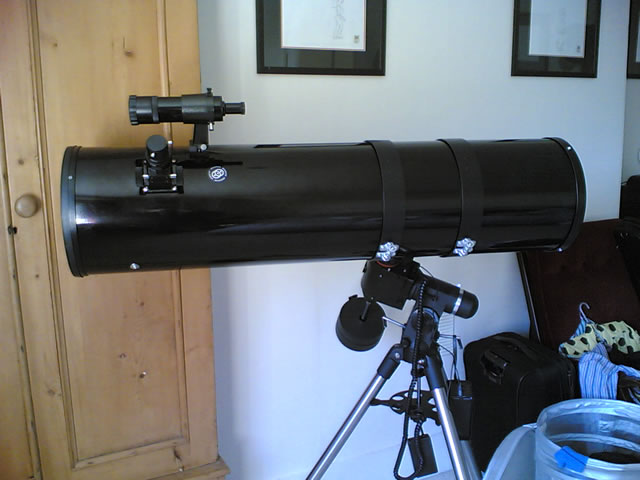
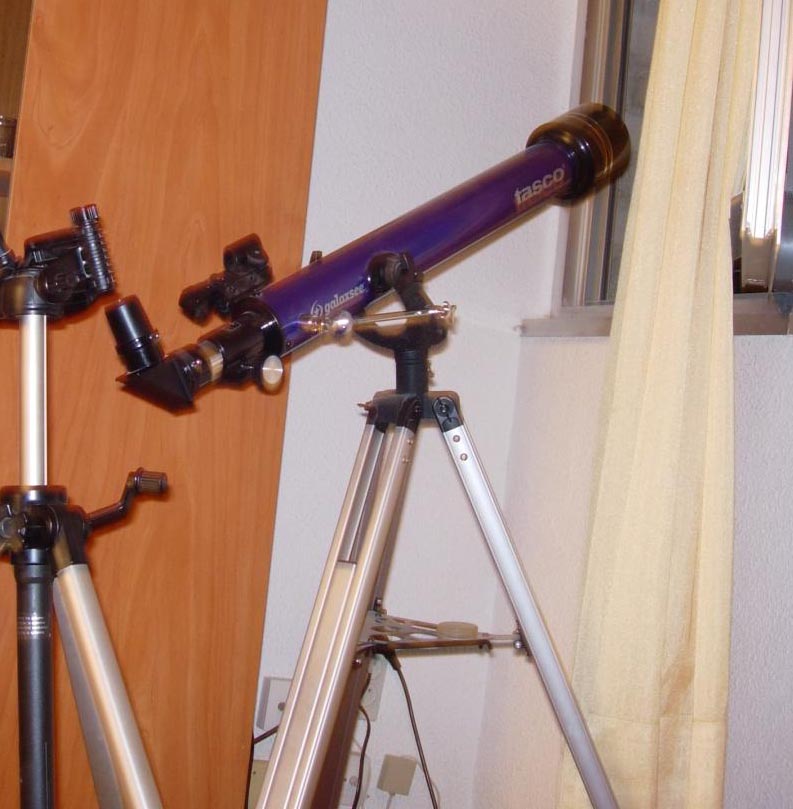
Whatever you do, don’t buy a scope that “looks like a telescope.” What I mean is, if it looks like a long thin tube, or you can picture Galileo using it, it’s the wrong thing. You want something short and fat. “Willowy,” “elegant,” and “sleek” are not the right words to describe the right telescope.

This is wrong

This is wrong (image courtesy of _guu_)

This is right (image courtesy of vbloke)

This is right (image courtesy of vbloke)

Price:

Telescopes less than about $200 generally have poor optics. If you want to go much below about $200, then get some quality binoculars instead.

AstroScan:

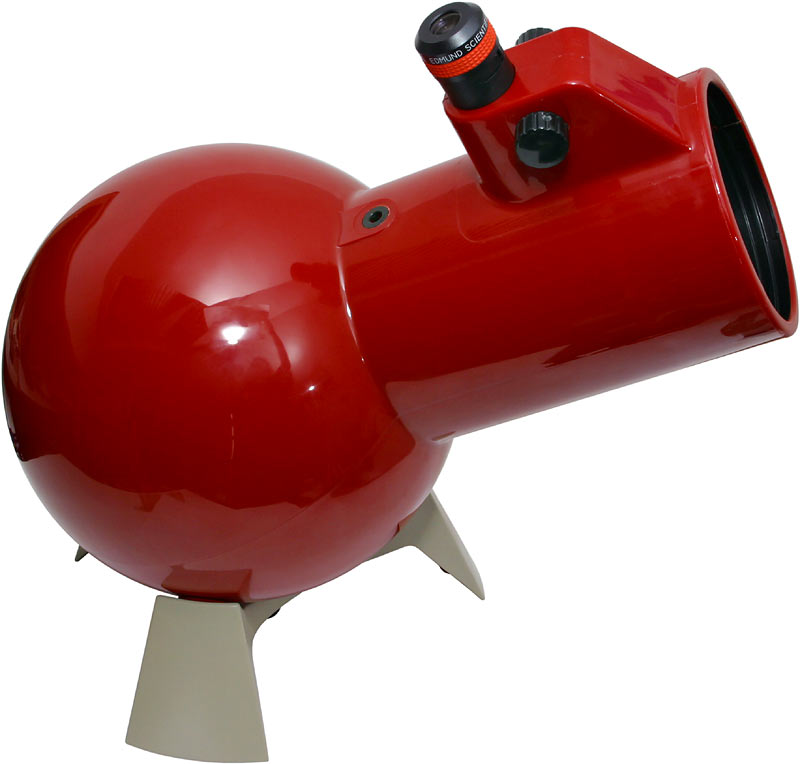
My favorite beginner telescope is the Astroscan from Scientifics. It is about $200. It’s cute and fun and simple. It has a very wide field of view (as opposed to very high magnifying power) and a ball-shaped bottom, so you can point it by simply moving it with your hands — no fiddly knobs and no computer to figure out. It’s easy to take camping where skies are dark. You just plop it on the ground or on a table or on the hood of your car. You can get a tripod for it if you want one, but you don’t need one.

AstroScan (image courtesy Scientifics Online)

AstroScan (image courtesy Scientifics Online)

Orion StarBlast:

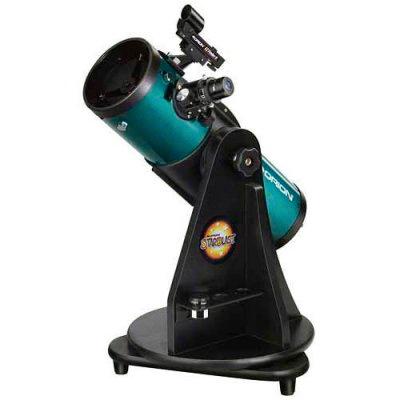
The other decent scope in that price range is the Orion StarBlast. It’s basically an AstroScan in a different shape. The mount is very easy to manipulate – just grab and point. It has a more complex finder-scope on the side than the AstroScan, which means it’s easier to mess up, but it is also slightly easier to use than the AstroScan’s sight.

I also have to admit that Orion got me with this one. They donated a StarBlast to PSC. I was quite skeptical at first, since I love the AstroScan, and I didn’t believe that anything could measure up. After I used it a few times I was sold. It’s a good scope. If I were buying a new scope, I’d buy an AstroScan, but this would be a close second.

Orion StarBlast (image courtesy Orion)

Orion StarBlast (image courtesy Orion)

Both of these scopes are compatible with all the normal-sized eyepieces available on the market. Most telescopes you get from a department store use a different sized opening, so you need to use their eyepieces, and you can’t slowly upgrade over time.

Binoculars:

Good binoculars and a tripod are usually the best option for beginning stargazers, but the scopes we mentioned are pretty close to just as good. We use the Meade Travelview 7x50s (about $30) here at Pacific Science Center, though anything that seems decent will work – even little birding binocs. If you want to be a little bit careful about your binoculars, get a pair of 7x50s from a company that you’ve heard of.

Meade Travelview 7x50s (image courtesy Meade)

Meade Travelview 7x50s (image courtesy Meade)

What’s Good for Beginners To Look At:

Remember, the Moon is by far the best thing to look at in the sky. The Moon looks huge and fantastic with a wide-field telescope like the Astroscan — you can see the whole Moon and lots of craters. The Moon also looks pretty good through good binoculars. The Moon changes every day — you see different craters each day. You don’t need dark skies to see the Moon. You can see some other things with a backyard telescope (that you can’t see with binoculars), like the rings of Saturn, and nebulas, but almost everything is very tiny or very faint compared to the Moon.

If you want higher magnification, so you can clearly see the stripes on Jupiter, the icecaps on Mars, and the gap in the rings of Saturn, then you will have the problem of how to accurately point a telescope with high magnification, and how to continually move the telescope to counteract the turning of the earth. The best solution is to use a computer and a motor to point the telescope, but this gets expensive. But the cheaper manual fiddly knobs are a pain. Also, if you don’t use a computer to aim your telescope, you need to be sure you have a good finder scope mounted on the side.

This is why I recommend a wide-field telescope like the AstroScan (or good binoculars) for beginners.

Want More?

Sky and Telescope’s advice:

Basics of Telescope Buying
Buying a Telescope as a Gift

More detailed advice:

ScopeReviews

Keith & Alice Enevoldsen

Chandra Sees Kepler’s Supernova

Four hundred years ago Johannes Kepler (the same Kepler who gave us Kepler’s laws) saw a new bright star in the sky: a supernova. Obviously, Kepler couldn’t take a photo of it, but he did take detailed notes. Those notes have allowed us to determine where in the sky we should look to see the remains of “his” supernova. Interestingly, this remnant has been puzzling current astronomers as much as it puzzled Kepler – even with all our new instruments.

The puzzle is this: what kind of supernova was it? Supernovae come in two basic flavors: Type Ia and Type II, and scientists can’t tell which Kepler’s was.

Type Ia:

Type Ia supernovae occur when you have two stars orbiting in a binary system: a white dwarf star and a larger companion star. If they’re close enough together, gasses fall from the bigger star onto the white dwarf, and if this happens too fast, the star explodes

Want More?

http://imagine.gsfc.nasa.gov/docs/introduction/supernovae.html